 I'm happy to report that the tin experiment worked.
I measured the size of the picture of the dog on the lid, worked out the curved corners were the exact size of a 5 cent piece (excellent), opened Word, inserted the photo I wanted to print, enlarged it until it covered the page and printed it out onto photo paper.
Then I decided which bit of the photo I liked the most, cut it out to the correct size then pasted it to the top of the tin using spray adhesive (making sure I masked off the white edges so they wouldn't get sticky.) finally, I pulled off the masking tape, covered the photo with waxed paper and used a roller to make sure it was flat.
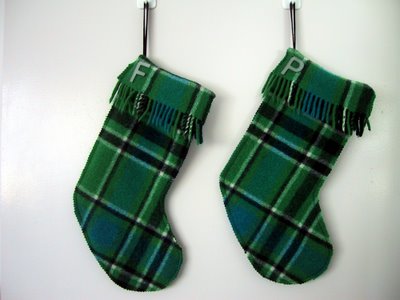
Simple as that. Now I want to go find more old tins to play with! Since I was on a crafting roll this afternoon I finally tackled the Christmas stockings I've been wanting to make for Mum and Dad using the piece of blanket you can see on the top of the pile of frugalled goodies here. Ironic, really, that I bought it for $NZ3 at Salvos on Taranaki Street Wellington, lugged it all the way home to Australia, made it into stockings which I will be taking back to a spot not 10 kilometres from where I got the blanket bit from!
Without cutting anything out I sewed round the stocking around the outside of the pattern then cut round it with my birthday pinking shears. I then sewed the fold down on the opposite side so when it was folded over at the top it was pinked side out to match the stocking (confused yet?)
I top stitched a length of single fold bias binding for the hanger, making sure it was long enough to fit over a door handle, then folded it in half, right side out and attached it to the inside of the stocking on the back seam.
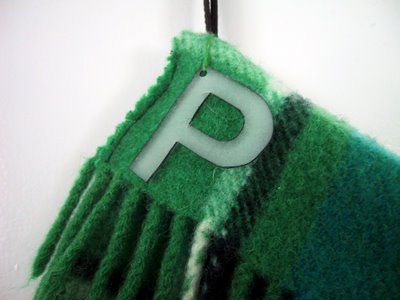
 And finally I made initials out of shrinky dinks and tied them on. So Santa won't get mixed up!
I'm feeling pretty chuffed all round and wondering if I should quit while I'm ahead or leap into the next project....
(*I was tossing up between this title and Rin Tin Tin)
well I have to ask what are "shrinky dinks" We aussies need translations or is it your none crafting friends!?!?
ReplyDeleteShrinky Dinks are plastic sheets that you craft with and stick the finished product in the oven and they (oddly enough) shrink.
ReplyDeleteSee here for the official site: http://www.shrinkydinks.com/
Or here for details of the last time I used them: http://theshoppingsherpa.blogspot.com/2006/04/uwyhm-project-1-completed.html
i feel like i've missed so much since the Borders post! all your thrifty finds are fabulous as usual! i have't been in a while but i'm going soon! (i was going to say tomorrow but i just realized that today is saturday not friday! oops!)
ReplyDeletethe stocking are great! your folks will love them!
This comment has been removed by a blog administrator.
ReplyDeleteI love the tin. I've collected a lot of tins with the intention of doing something crafty with them. I would love to try something like this. I didn't understand the bit about the wax paper over the photo. After you adhered the photo to the tin did you adhere the wax paper over the photo with more adhesive spray?
ReplyDeleteHi Brittany
ReplyDeleteThe wax paper was only used to protect the photo while I ran over it with the roller to make sure there weren't any air bubbles. I simply laid it on top and when I was finished threw it away.
(I forgot to mention I also had to go round the outside of the photo with a cotton bud after I'd used the roller to collect the extra glue that had seeped out from under the photo in the process.)
very fine.. the box is awesome.. the picture-perfect..
ReplyDeleteand the stockings are beautiful too..
Love that tin idea! May have to steal it.....
ReplyDelete:)