Monday, February 29, 2016

Playing with plastic (spoiler: it didn't go well)

IDO3D pen next to a miniature crate made with it.
I wanted so much to like the IDO3D pen set I won. It sounded like something that would be really useful for miniatures, and great fun to boot.

But it wasn't. At least not for me. It was difficult and sticky and time consuming and messy and frustrating.

I had some vague ideas of what I wanted to try making with the pens, and started with a tray.
IDO3D pen about to draw on a QR code.
The first surprise for me was that the ink wasn't as dark as I'd thought it would be. The green pen came out more the colour of radioactive sludge that the green I'd expected. 
IDO3D pen drawing around a QR code.
It was impossible to keep the lines straight, and when I 'coloured' in the middle of my shape, there were a number of air bubbles. At this stage I was thinking that I hadn't quite got the technique as it was my first try.
IDO3D pen colouring in a QR code.
The pen also leaked. Another thing I put down to my lack of experience.
Leaking IDO3D pen next to a finger with blobs of plastic in on it.
I followed the instructions, and used the UV spotlight included in the set to dry the plastic shape.
IDO3D spotlight drying a plastic shape.
Then I tried adding another layer of ink around the edge to start building up the sides of the tray.
IDO3D pen drawing on a plastic shape.
 It didn't go well. I realised that this pen doesn't cope with building up, so my tray would have to be built in five parts and then combined. Not something I felt like doing. So I dried the end result and peeled it off the backing.
IDO3D pen drawing next to a plastic shape with an edge drawn on it.
Which left a big sticky patch, which surprised me. The instructions had said to dry the shape for 30 seconds, and I'd dried each corner for that length of time (as the shape seemed too large to be covered completely by the light to dry all at once). This meant that drying this one piece took two minutes.
IDO3D pen drawing next to a plastic shape with an edge drawn on it. and a UV spotlight,
I decided it was a good first effort/ learning experience and moved in to my next idea: a lattice-work fruit bowl.
IDO3D plastic support, pen and spotlight.
Using the plastic support, I drew a circle and then a lattice within it. The ink from the edge of the circle dripped down the side of the support, and the ink on the inside lines spread across, filling the spaces between. 
Once again, I found the actual colour of the pens to be disappointing, and the end result sticky and floppy.
Drying a piece drawn with an IDO3D pen with a UV light.
Before I gave up completely, I decided to test the ability to build a 3D object by 'gluing' several flat pieces together with the ink, then drying the joins. By this stage I'd washed my hands several times with soap and warm water to try and get rid of the stickiness, without success (although I did succeed in making the taps sticky, the basin sticky and the towel sticky: don't even ask about my camera and keyboard!)
IDO3D UV spotlight drying three square grid pieces.
I drew some basic crate sides and dried them. And dried them. And dried them. And dried them Five shapes times two minutes per shape equalled ten (very boring and sticky) minutes in total.

Then I tried to attach them to each other.

Granted it did work, but the result was wonky and floppy and sticky, rather than the square and rigid and smooth that I'd imagined.
IDO3D UV spotlight drying two square grid pieces attached to a base.
After telling myself that I couldn't expect perfection on my first try, I decided to check out the reviews on Amazon, which pretty much agreed that it wasn't me that was the problem.

If you want to learn more, here's a good review on YouTube.

Would I recommend the IDO3D pen set?
No.

Am I glad I didn't have to pay for this one?
Yes.

Would I give my set to a friend's children now I don't want it any more?
Only if I hated said friend. I'm not even going to donate it to the op shop. I'm not that mean. I will keep it, though,  in case I want to try again to see if my technique has improved and the stickiness is less of a problem on a second attempt...

Sunday, February 28, 2016

Getting there eventually

Box of an I DO 3D pen set.
 Back in October last year, I entered (and won!) a Spotlight Facebook contest with the prize of an IDO3D pen set.

It's been sitting on my desk ever since, waiting until I had the time and energy to focus on it (and the clear space to photograph it). Having had a whole weekend at home, I made the time to clean up at least part of my studio so I have space to work again. Which also meant space to unpack the IDO3D pen set and see what it's all about.

For such a large box, there's not very much in it:
Contents of an I DO 3D pen set, including instruction and tracing sheets, plastic forms, pen tips, a spotlight and a bag with pens in it.
instruction and tracing sheets, plastic forms to work on, two pens and pen tips, and a spotlight.

I start with the bits that need putting together before use.
I DO 3D pens and pen tips in packets, an instruction sheets, plastic forms and a spotlight.
The pens come with caps for shipping: unscrew these and screw on the tips that come with the kit.
Two I DO 3D pens and their matching tips, with the bag they came in.
I was a little surprised that the pens seem to be full of liquid plastic. I expected them to have some sort of extrusion instead: probably through my familiarity with 3D printers.
Mouth of an I DO 3D pen, with cap and tip in the background.
Two I DO 3D pens with tips on.
 Next, insert three AAA batteries into the spotlight.
I DO 3D spotlight with instructions, three AAA batteries and a screwdriver.
(Unless they're not charged, in which case pop them in the charger and write a blog post while you wait for them to charge. *sigh*)
Parts of the I DO 3D spotlight next to a battery charger charging three AAA batteries.
To be continued...

Saturday, February 27, 2016

Mini excuses...

...why I've not blogged properly for a month:

1. I've been working full time and it's been exhausting.

2. I was sick (for three days, but still...)
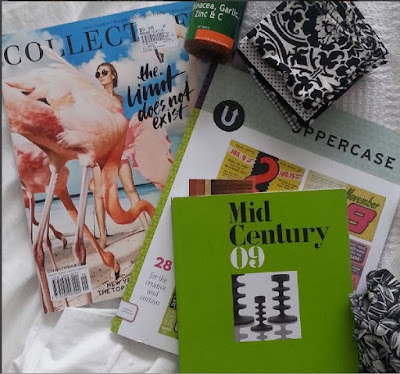
Selection of magazines on a bed, along with a number of black and white hankies and a bottle of  vitamin tablets.
 3. I've volunteered as an Unorganiser for this year's Unconference Canberra, which has been sucking up my spare time.
Group of people sitting around a coffee table filled with various drinks and glasses.
4. I had to get the February issue of The tiny Times finished before I could do anything else.
Magazine with a red pen on top of it, next to a plate with a breakfast burger on it.
5. And once I had, the last thing I wanted to look at was anything miniature-related.

6. I've been helping a friend pack for an inter-state shift.

7. I've been having fun being social with some of the money I'm earning.

8. I was waiting to hear back about what was happening with Bette Noir.

9. It's been too hot in the evenings to do anything other than collapse in a puddle of sweat.

10. My studio is such a disaster zone there's not been room to work on anything, even if I felt the urge.

But this weekend I've run out of excuses. And I have the time to sort out my flat (including finding my desk).

Which means I finally photographed the package from Catherine that turned up a couple of weeks ago and has been patiently waiting for my attention ever since.

Catherine had kindly offered to send me some fabric that she thought I'd like, but managed to sneak a few little extras into the package
A bag of miniature items and two matchboxes on top of an event invitation and a postcard.
 including a matchbox full of miniature (non-working) Christmas lights,
Matchbox with two strings of miniature Christmas lights spilling out of it.
 and another full of glasses (or vases).
Matchbox with nine miniature blue glasses or vases spilling out of it.
 There was also a bag of treasures, including two tissue boxes that I believe Catherine made herself.
Selection of miniature items laid out on a tabletop, including woven vases, tissue holders, posters and plastic flamingos.
Plus, of course, the fabric that she had originally offered me (and a lot of extra pieces that somehow snuck into the package...)
Selection of fabric samples and pieces of fabric, laid out on a table.
Thank you, Catherine. I'm really hoping that I can carve out some time (and inspiration) to return to mini-making by the end of the month.

Thursday, February 04, 2016

Ten: tin

Today marks ten years since I started this blog.

I'm feeling pretty much the same as I was feeling this time last year.

I should have planned. Sorted out a photo of a scene with a theme to match that of a tenth anniversary.

My excuse this year is that I started a new full time job three weeks ago. And have been sick this week.

Perhaps I can pull something together this weekend? (At the very least finish the kitchen with the tin splashback...)

Ten years? Really?? Perhaps I need to delve through the archives and commit to something like Throwback Thursday or Flashback Friday over the next year.